Welcome to Your VoiceMaster Dashboard!
Your VoiceMaster dashboard is the control center for your Discord server's voice channels. It's where you configure temporary channels that appear when people need them and disappear when they don't. This keeps your voice channel list organized and clean.
This guide will walk you through every page, feature, and setting. By the end, you'll know how to use all dashboard features effectively.
Getting Started - Your First Steps
Here's how to access your dashboard and what you'll find there.
How to Access Your Dashboard
1
Step 1: Go to voicemaster.xyz and log in with Discord
2
Step 2: Click your profile picture in the top right corner
3
Step 3: Select "Dashboard" from the dropdown menu
4
Step 4: Choose a server from the left sidebar (you need admin permissions!)
What You'll See
Your dashboard has three main areas:
Server Settings - Control how voice channels work on your server
Personal Settings - Set your own preferences for creating channels
Premium - Manage your subscription and unlock advanced features
Tip: Start with Server Settings to get your bot working, then explore Personal Settings to customize your experience.
Server Settings - Making Your Bot Work
Server settings control how VoiceMaster behaves on your Discord server. You'll need to select a server first - the dashboard will show you all servers where you have admin permissions.
1. Setup Page - Creating Your Voice Channel Templates
Create templates for your temporary voice channels. When someone joins a "Join to Create" channel, VoiceMaster uses these setups to create a new channel for them.
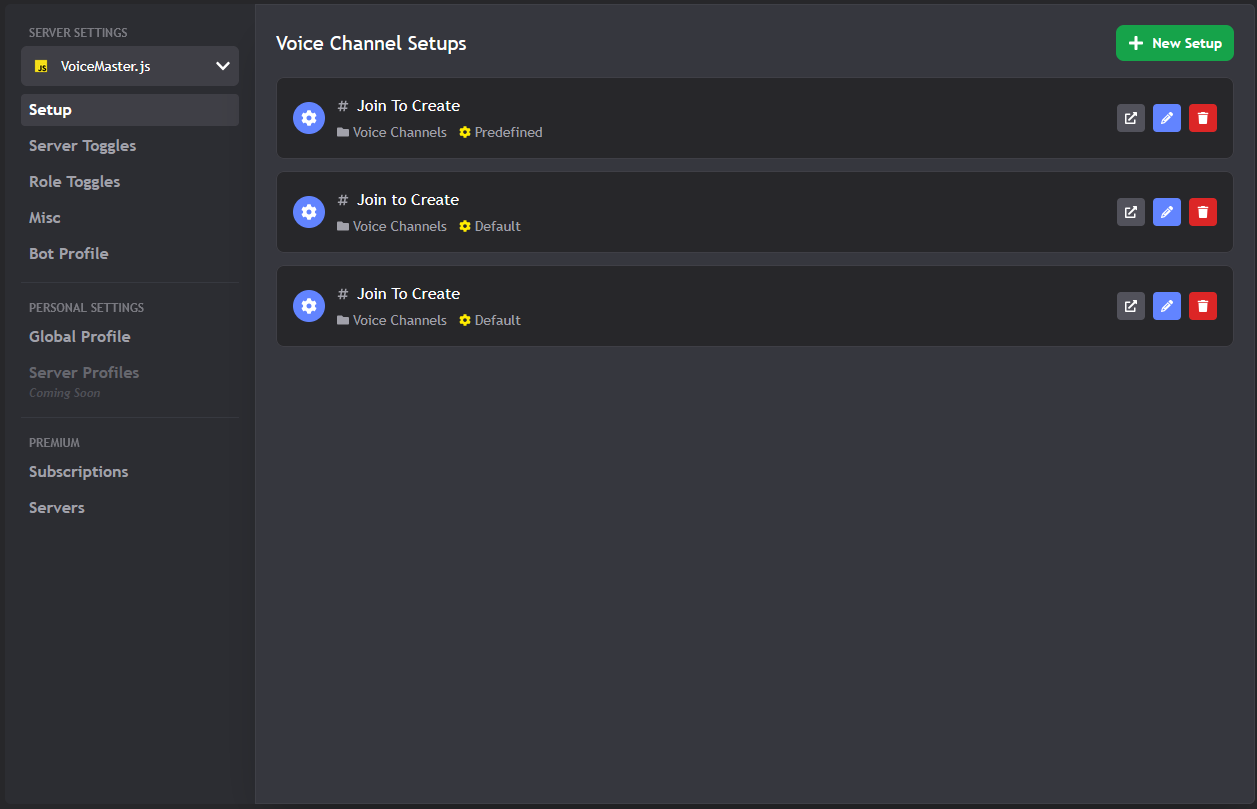
The main setup page where you create voice channel templates
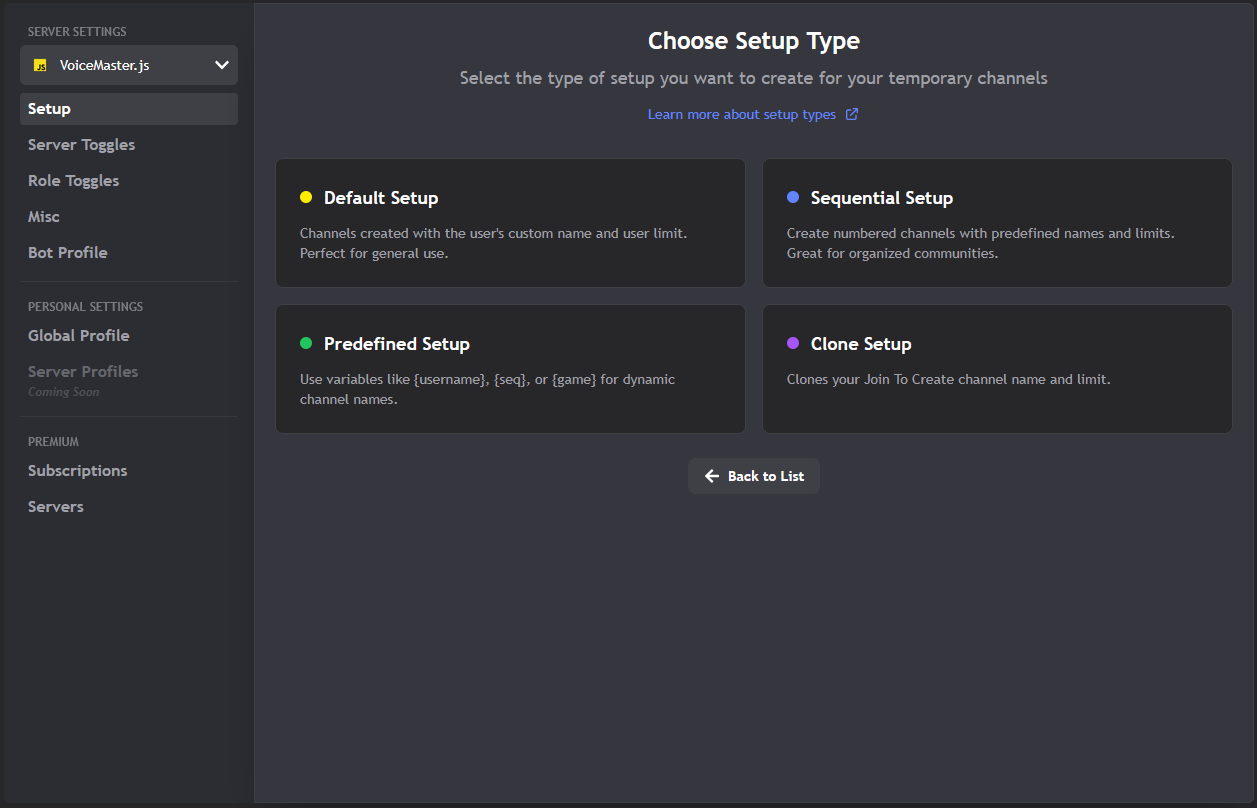
Step-by-step setup creation process
What You Can Do Here
- Create New Setups: Click the big green "New Setup" button to start
- Edit Existing Setups: Click the pencil icon on any setup to modify it
- Delete Setups: Click the trash icon to remove setups you don't need
- View Setup Details: See which channel each setup is connected to
The Three-Step Setup Process
Creating a setup involves three main steps:
Free vs Premium Limits
Free servers: Can create 1 setup
Premium servers: Unlimited setups
Tip: Start with one setup to test everything works, then upgrade for more flexibility.
2. Server Toggles - Global Feature Control
Control features for your entire server. You can turn features on or off for everyone at once.
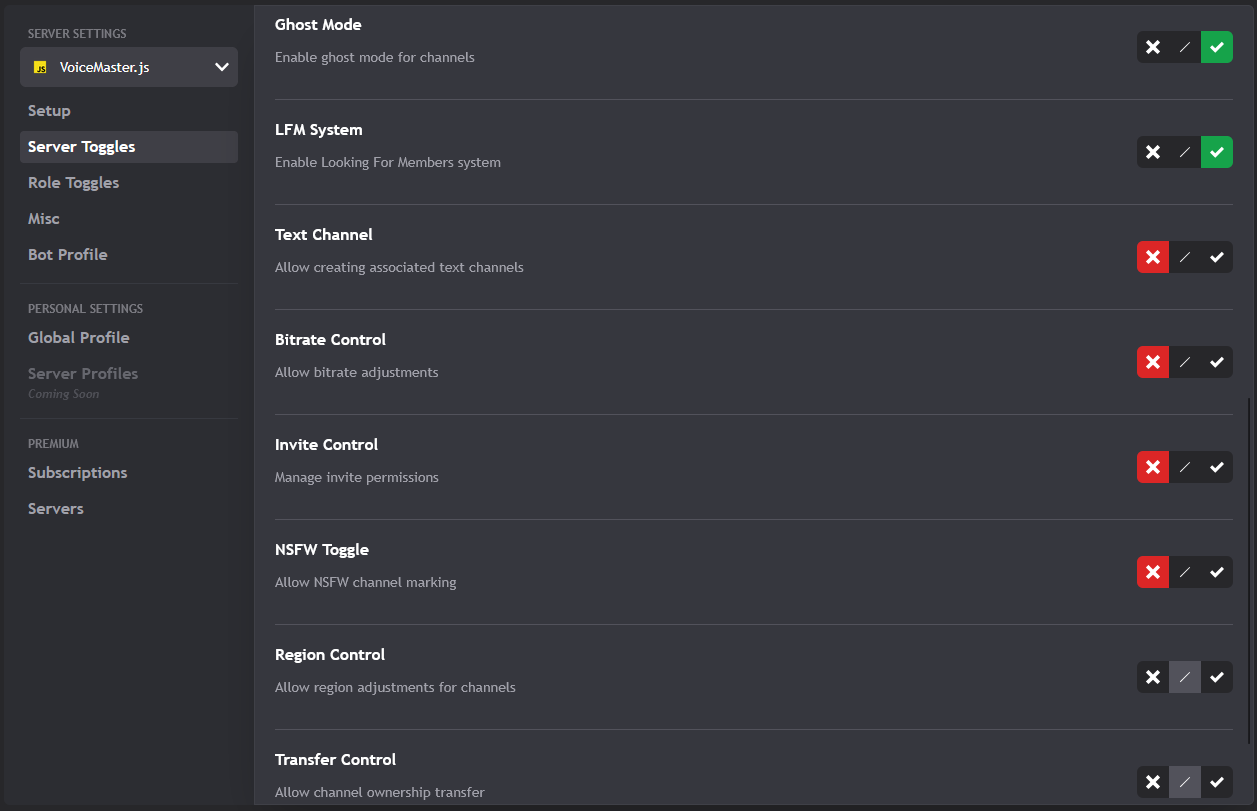
Global feature toggles for your entire server
What This Controls
- Voice Commands: Which
/voicecommands work on your server - Auto-Features: Things that happen automatically
- Moderation Tools: Bot features for managing channels
- Customization Options: Advanced features and settings
How to Use It
- Toggle On/Off: Click switches to enable or disable features
- Reset to Defaults: Click the reset button to start over
- Save Changes: Your changes apply immediately when you save
3. Role Toggles - Different Rules for Different People
Set different permissions for different roles. Configure what each role can and cannot do with voice channels.
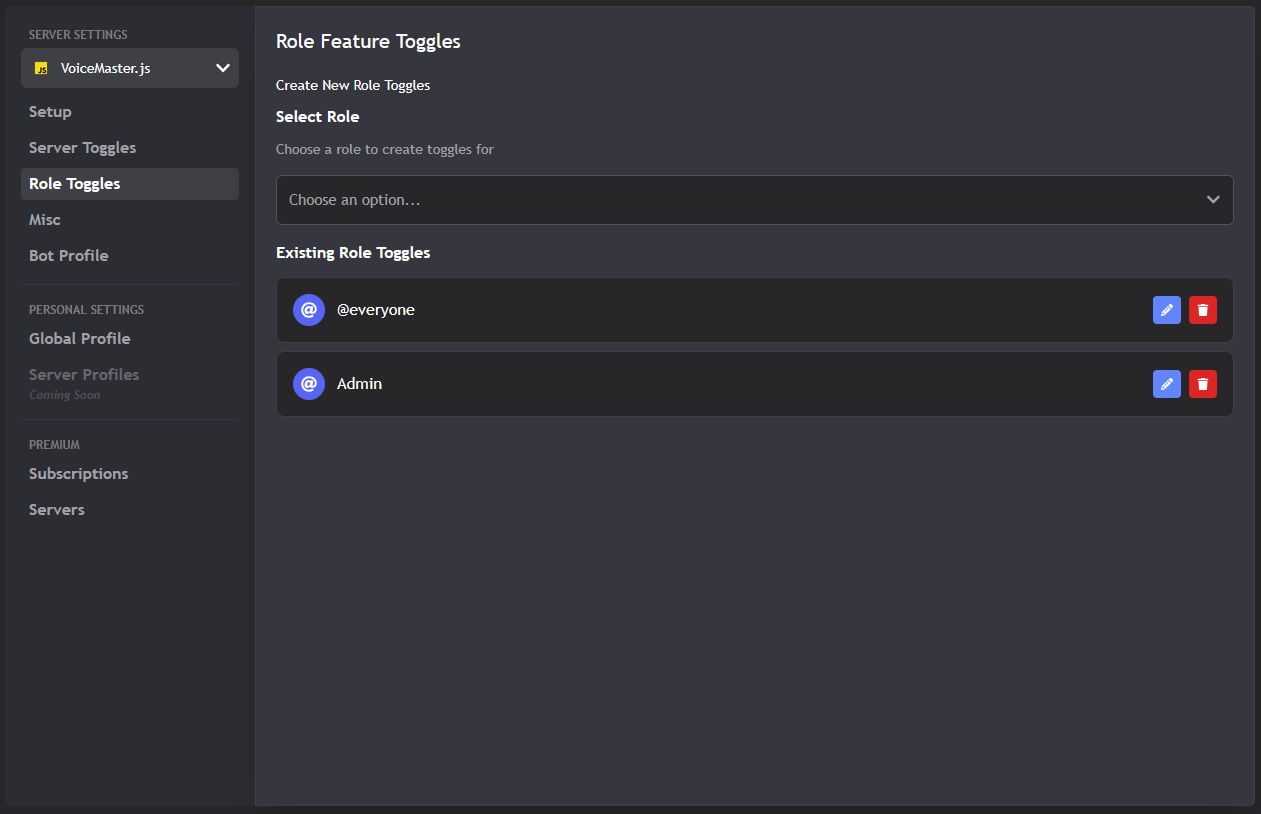
Configure different permissions for different roles
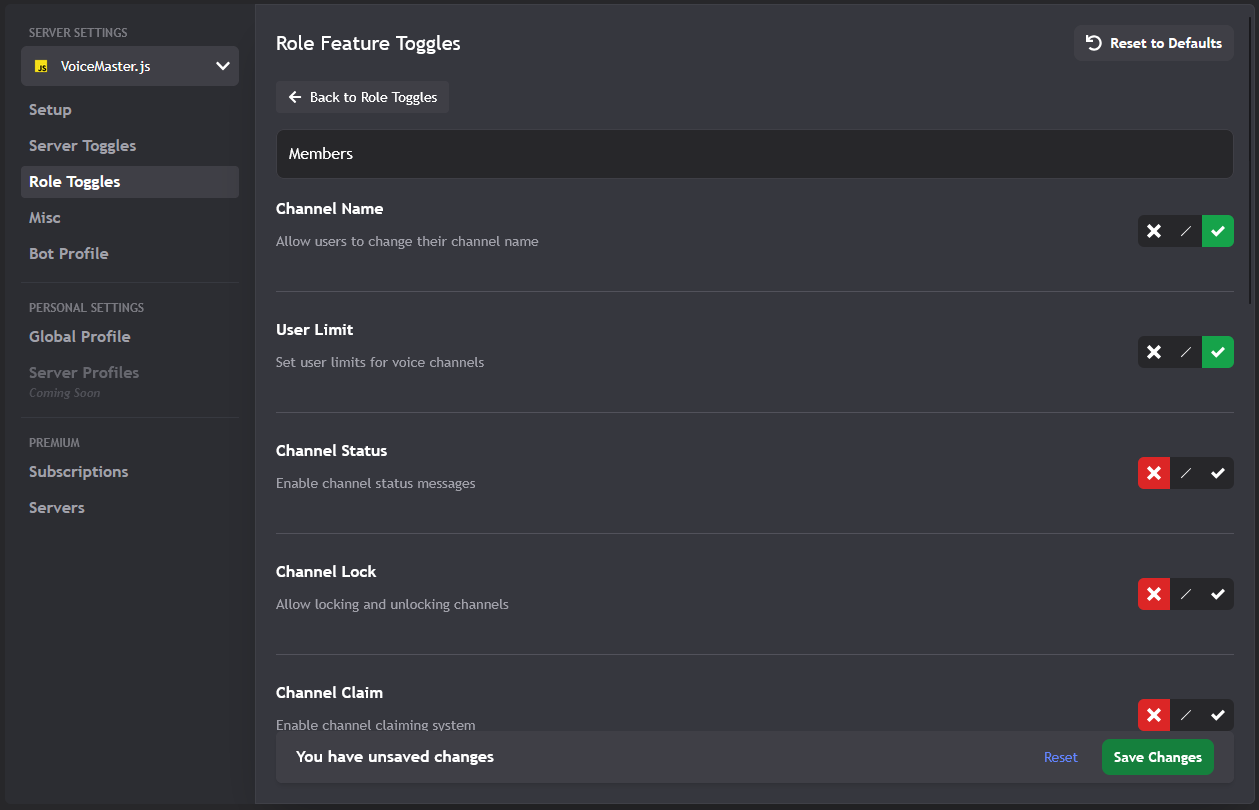
Detailed role permission settings
How It Works
- Select a Role: Pick a role from your server's role list
- Set Permissions: Choose which features that role can use
- Save Settings: Apply the role-specific configuration
- Create More: Set up different rules for different roles
Common Role Setups
- Administrators: Full access to everything
- Moderators: Most features, but some restrictions
- Members: Basic voice channel features only
- VIP/Donators: Extra features and customization
Premium Feature
Role toggles require a premium subscription and the server must be activated for premium features.
4. Misc Settings - The Extra Stuff
This page contains additional settings that don't fit into the other categories. These are extra configuration options for your server.
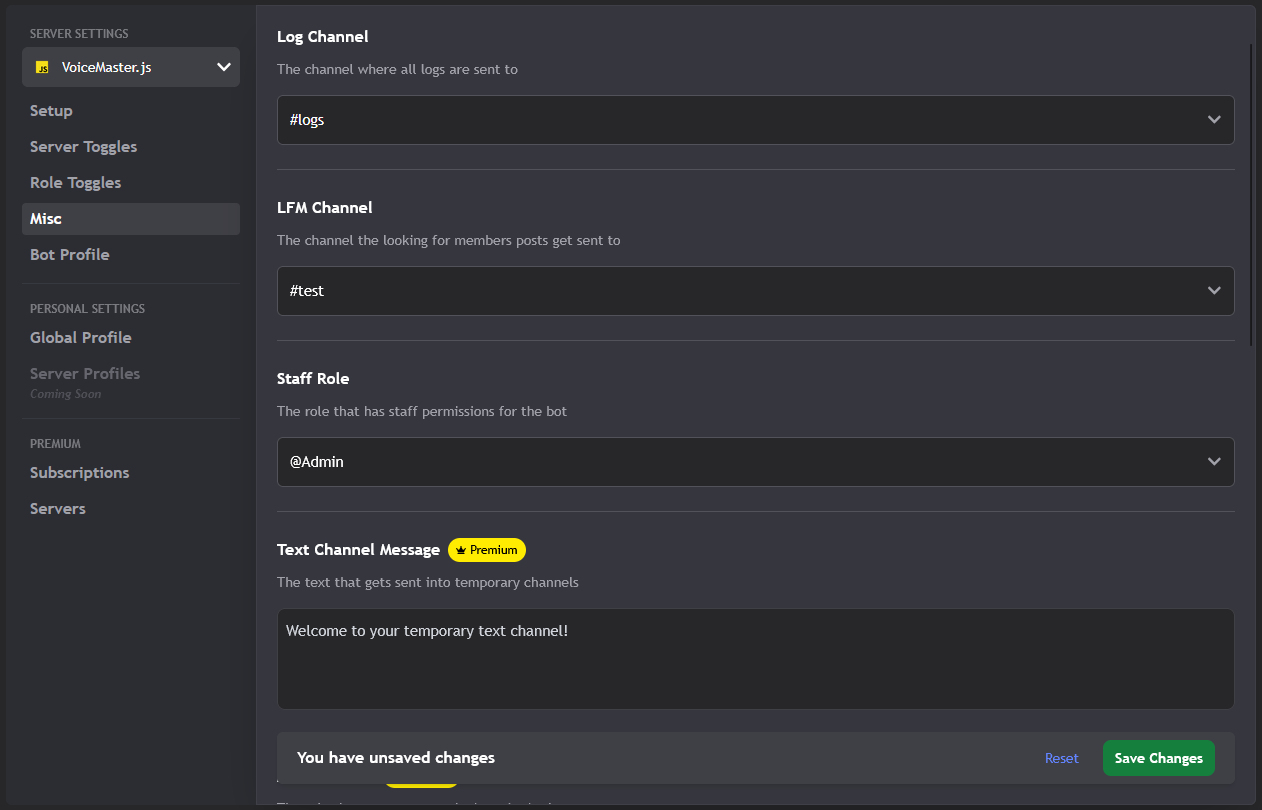
Additional server configuration options
Free Settings (Available to Everyone)
- Log Channel: Where bot notifications and logs go
- LFM Channel: Where "Looking for Members" posts appear
- Staff Role: Which role has special bot permissions
Premium Settings (Require Subscription)
- Text Channel Message: Custom message sent to new text channels
- Member Role: Define your server's main member role
- Text Channel Access Role: Who can see temporary text channels
- Join Role: Role given when people join temporary channels
- Move Member: Allow moving people between channels
- Auto Text: Automatically create text channels with voice channels
5. Bot Profile - Customize Your Bot's Look
Want your bot to look different on your server? This is where you customize the bot's nickname, avatar, banner, and bio!
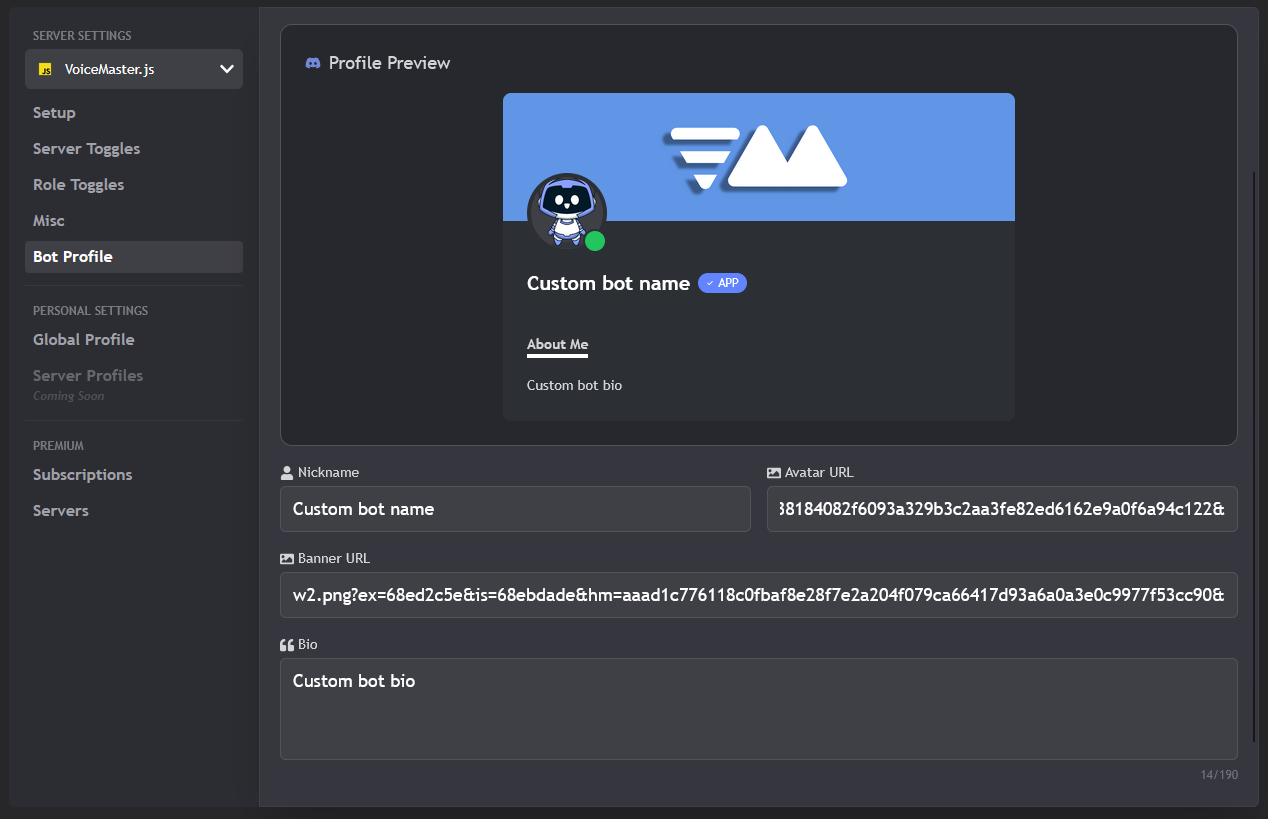
Customize your bot's appearance and profile
What You Can Customize
- Nickname: Change how the bot appears in your server
- Avatar: Set a custom profile picture
- Banner: Add a custom banner image
- Bio: Write a custom bio/status
How It Works
1. Make Your Changes: Fill out the form with your custom content
2. Submit for Review: All changes need staff approval (keeps things appropriate!)
3. Wait for Approval: You'll get a Discord notification when approved
4. 24-Hour Cooldown: After approval, you can't change it again for 24 hours
Important Rules
Content Guidelines: Keep everything appropriate! NSFW or inappropriate content will result in permanent blacklisting.
Premium Feature: Bot customization requires an active premium subscription and the server must be activated for premium features.
Personal Settings - Your Own Preferences
These settings are all about YOU! They control your personal preferences when you create voice channels, whether you're on your own server or someone else's.
1. Global Profile - Your Default Settings
Set your personal preferences that apply everywhere you go. These settings are used by default when you create a voice channel on any server with VoiceMaster, unless you have a server-specific profile configured.
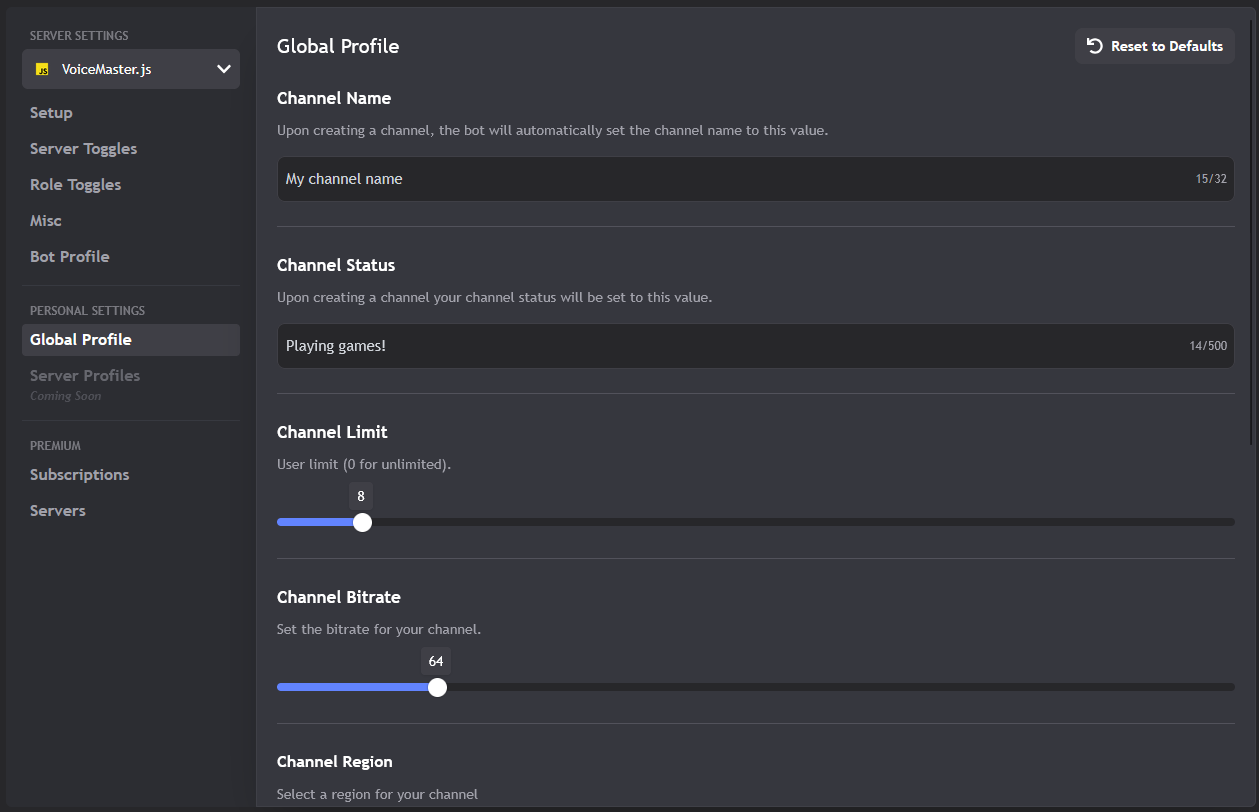
Configure your personal voice channel preferences
Vote Requirement
You need to vote for VoiceMaster on Top.gg to access global settings! This helps support the bot. You can vote once every 12 hours.
What You Can Set
- Channel Name: Your preferred channel naming pattern
- Channel Status: Default status message for your channels
- Channel Limit: Your preferred user limit (0 = unlimited)
- Channel Bitrate: Your preferred audio quality
- Channel Region: Your preferred server region
- Channel NSFW: Whether to create adult channels by default
- Channel Lock: Whether to lock channels by default
- Channel Ghost: Whether to hide channels by default
- Text Channel: Whether to create text channels automatically
2. Server Profiles - Different Settings for Different Servers
Want different settings for different servers? This feature lets you create server-specific profiles! (Coming soon)
Coming Soon!
This feature is currently being developed. Soon you'll be able to:
- Create different profiles for different servers
- Set server-specific channel preferences
- Switch between profiles easily
Stay tuned for updates!
Premium Features - Unlock the Good Stuff
VoiceMaster+ unlocks tons of amazing features! Here's how to manage your subscription and make the most of your premium access.
1. Subscriptions - Managing Your Premium
Keep track of your subscription, see what you're paying for, and manage your billing.
What You Can Do
- View Active Subscriptions: See your current plan details
- View Previous Subscriptions: Check your subscription history
- Cancel Subscription: Stop your subscription (if not lifetime)
- Upgrade: Move to a higher tier plan
- Renew: Reactivate an expired subscription
Subscription Tiers
- VoiceMaster+: 1 server slot, basic premium features
- VoiceMaster++: 3 server slots, more premium features
- VoiceMaster+++: 10 server slots, all premium features
2. Servers - Managing Your Premium Server Slots
Your premium subscription comes with server slots. This page shows you how many you have and which servers are using them.
Understanding Server Slots
Server slots are premium licenses for your servers. Each slot allows one server to use premium features.
Slot Limits by Plan:
- VoiceMaster+: 1 server slot
- VoiceMaster++: 3 server slots
- VoiceMaster+++: 10 server slots
What You Can Do
- View Usage: See how many slots you're using (e.g., 2/3)
- Add New Server: Invite the premium bot to a new server
- Remove Server: Take premium access away from a server
- View Details: See which servers have premium features
Need More Help?
Still have questions? We've got you covered!
- Troubleshooting: Check our Troubleshooting Guide for more solutions
- Setup Guide: Learn the basics with our Setup Guide
- Support Server: Join our Discord Support Server for real-time help
- More Guides: Browse our other guides for advanced tips and tricks
Recommended Reading
- Setup Guide - Get your bot working in minutes
- Troubleshooting Guide - Fix common issues
- Premium Features Guide - Unlock advanced features
This guide was last updated on October 12, 2025. For the most current information, please refer to our official documentation and support resources.
Found translation issues or think this guide needs updating? Let us know via our support server.